Docs / Bookings
Adding Events
Events are one-off or recurring experiences for which bookings can be made. This section covers booking options and event settings.

Creating Events
To get started, go to /manage-events from the side menu.
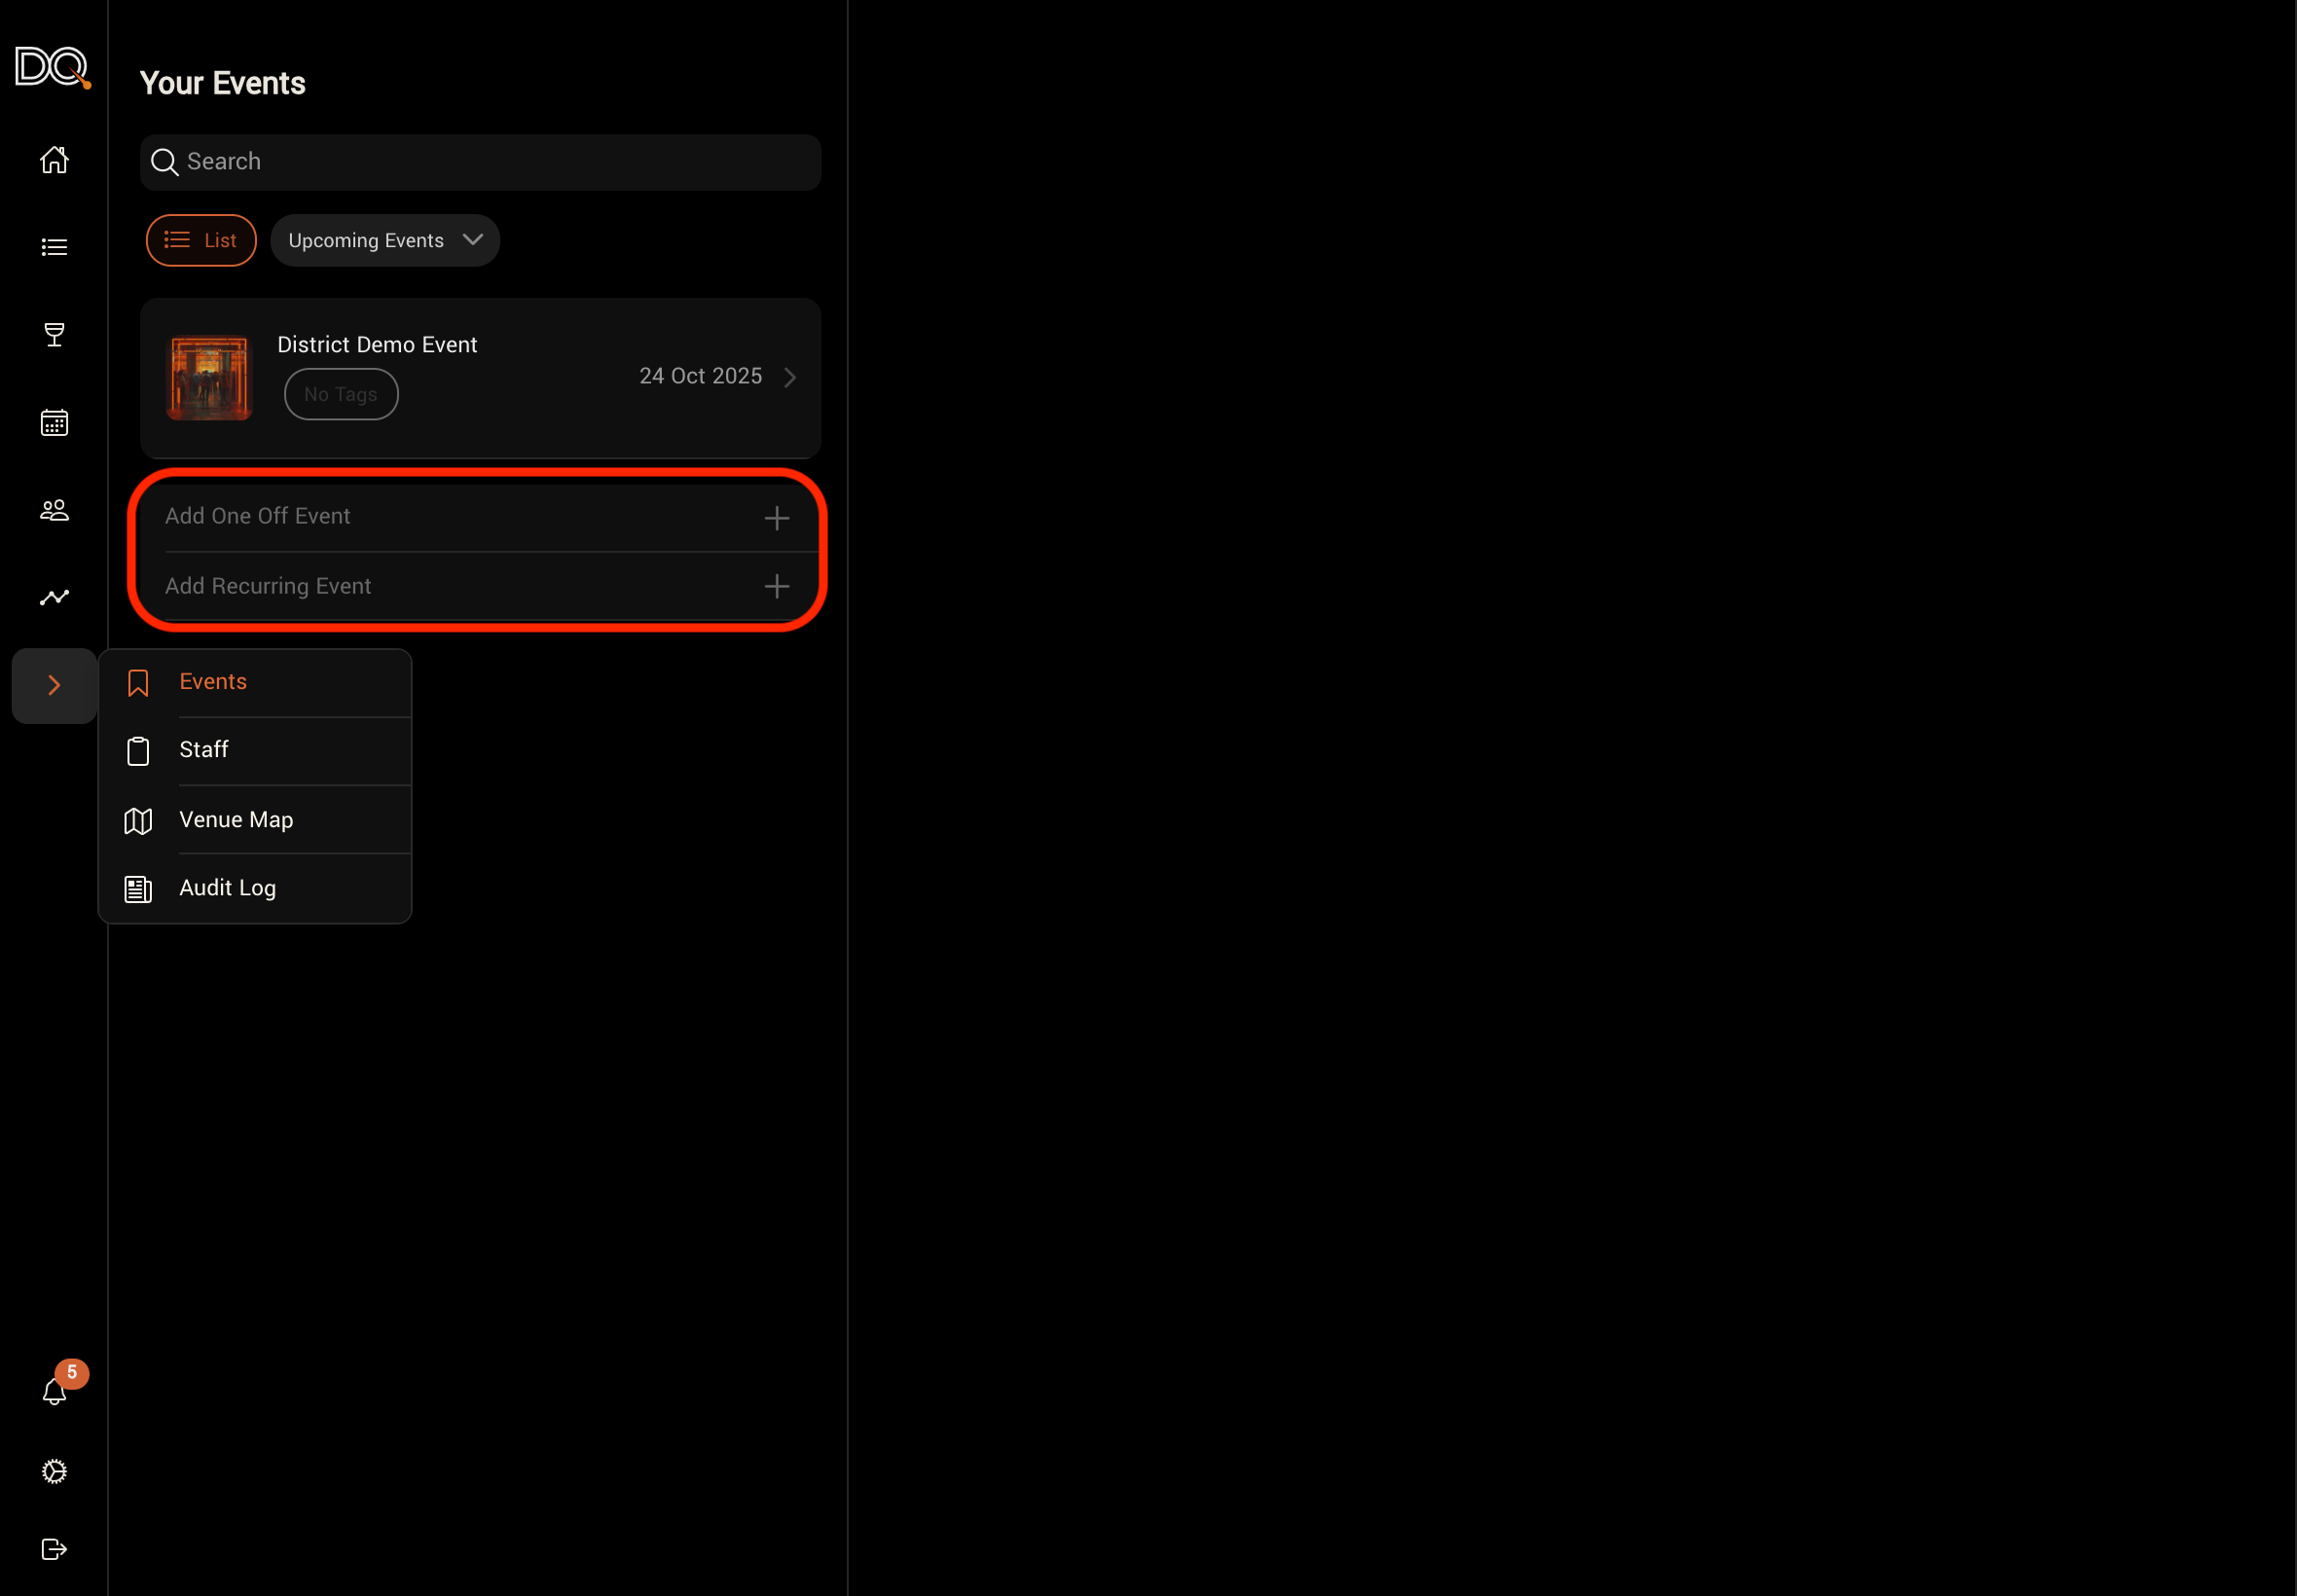
When creating an event, you can choose between a one-off or a recurring event. Recurring events can be automatically duplicated with the same settings for an upcoming date.
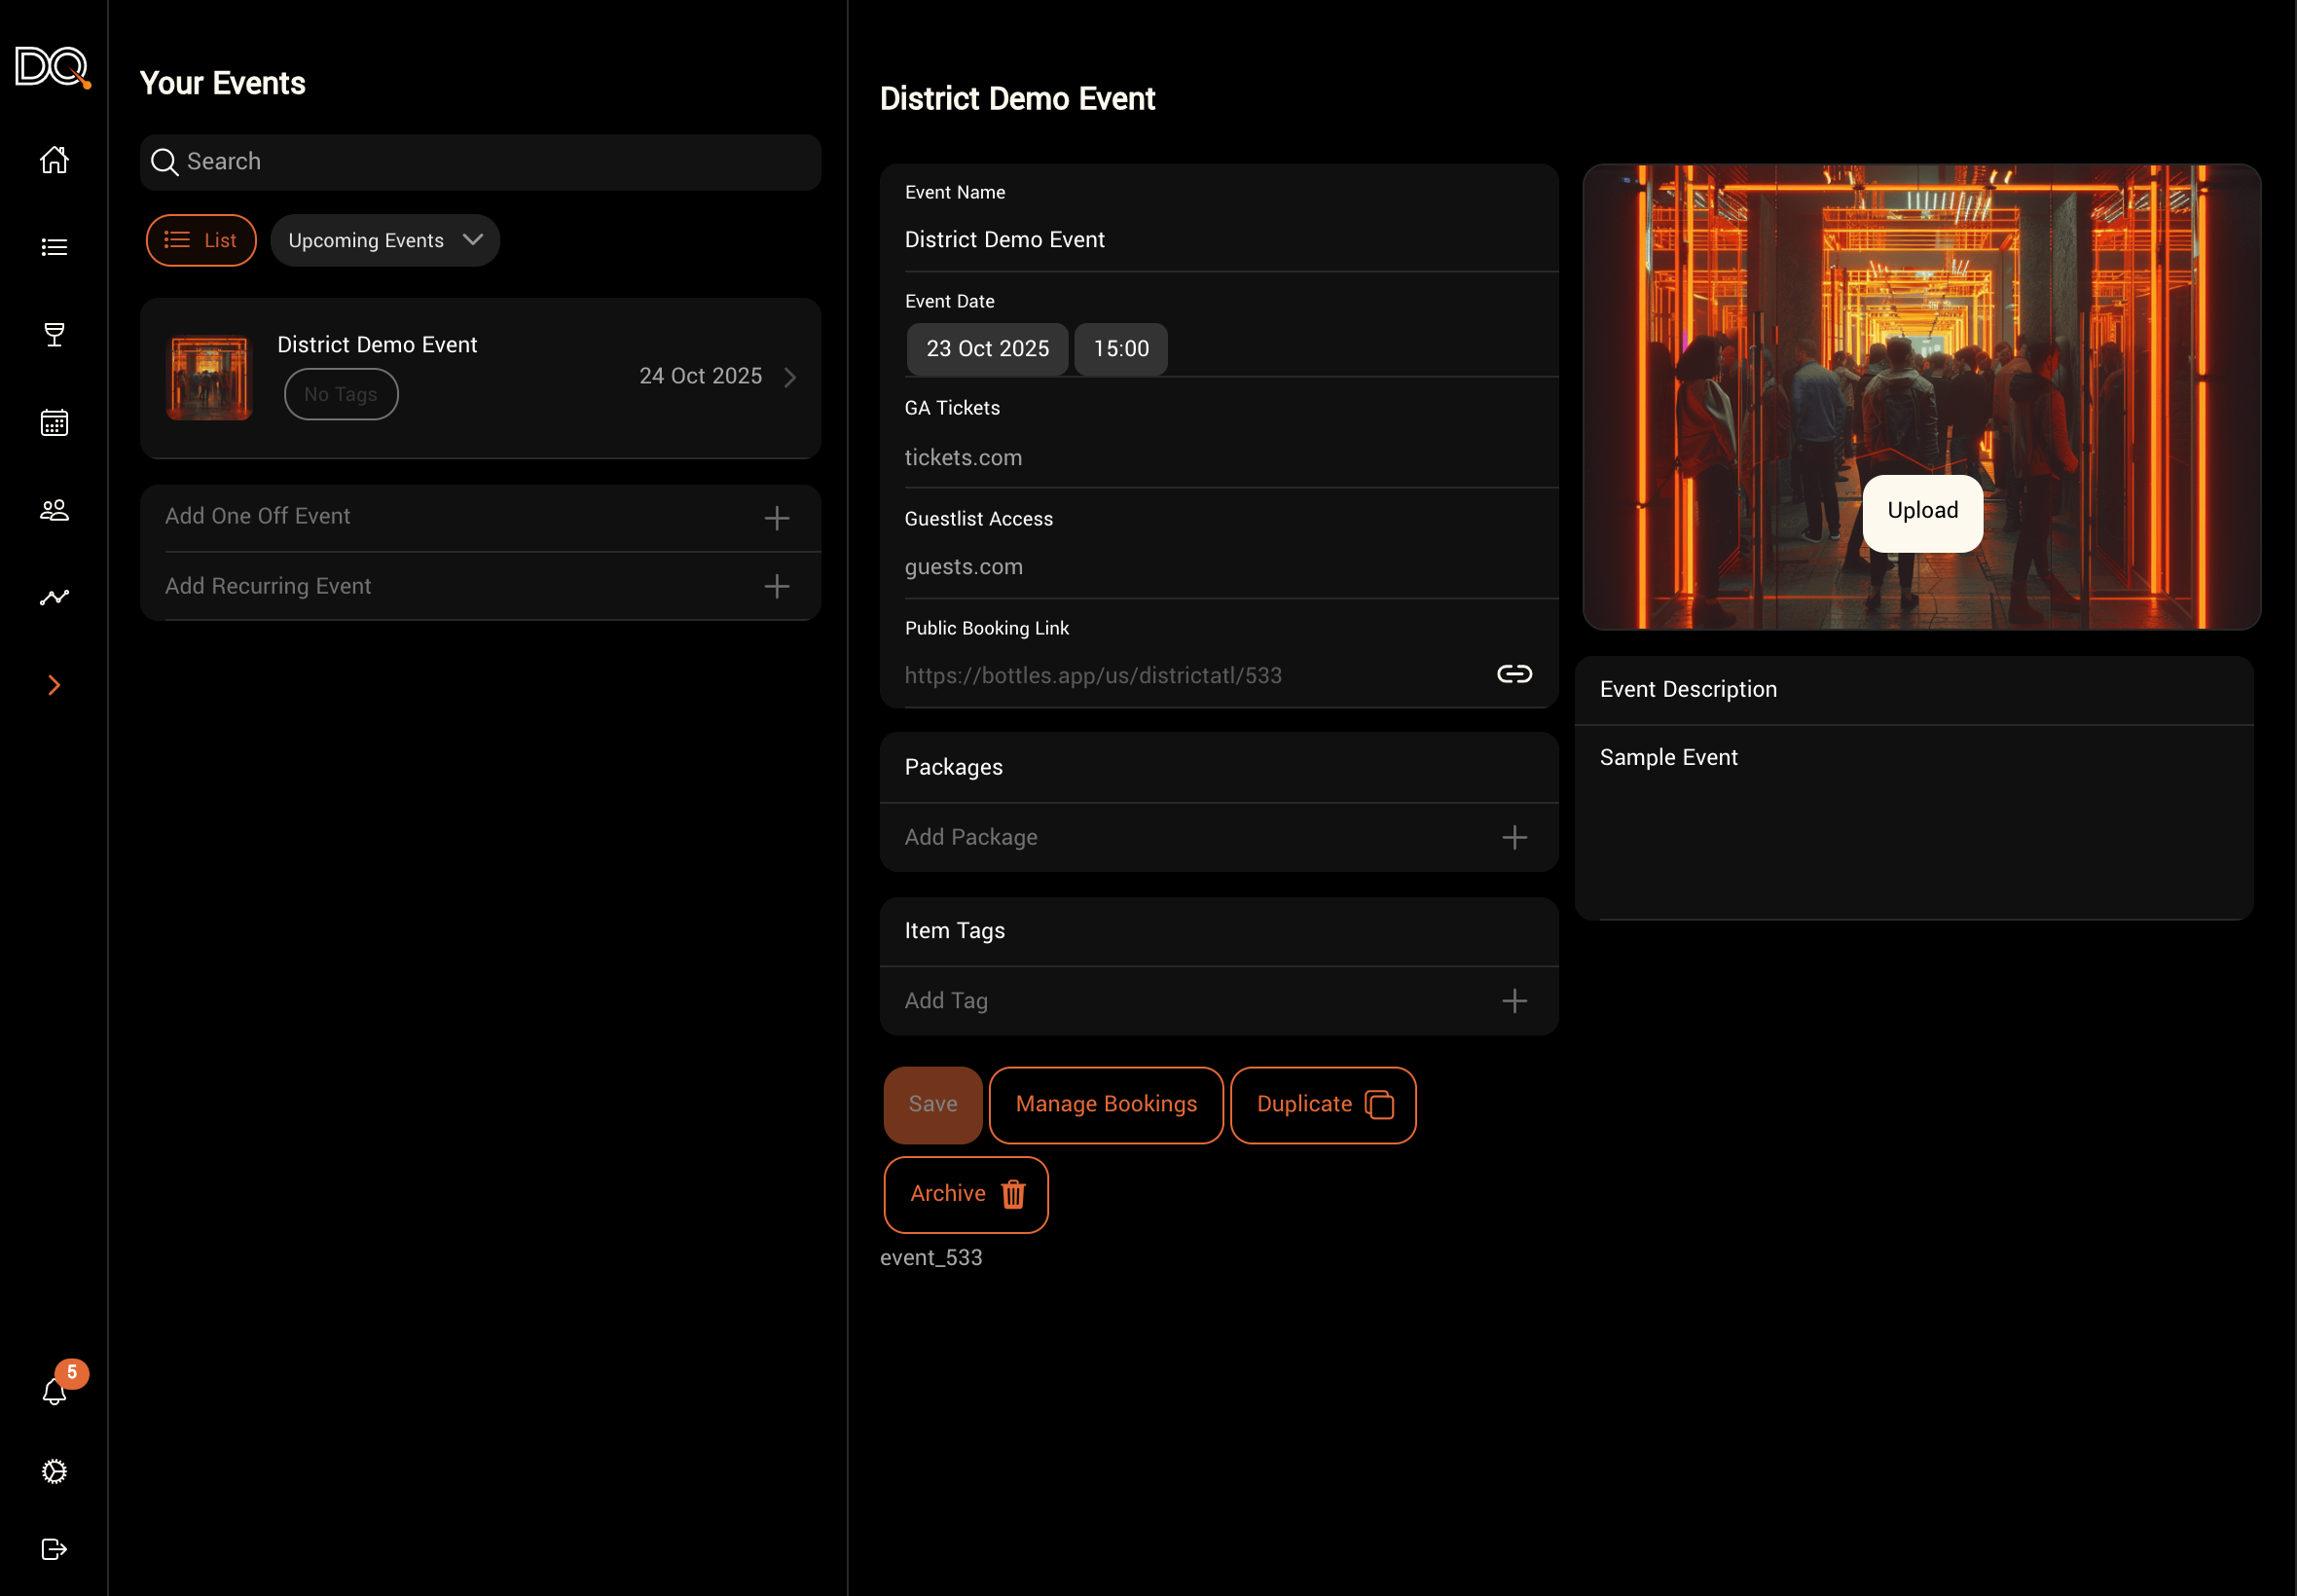
You’ll need to provide a date, a description, and select the available booking options.
You may also add an image and any relevant tags.
💡 Adding tags helps you better identify and segment your guests.
Event Properties
Property | Description | Required |
|---|---|---|
Name | Name of the event | Yes |
Date | Date and time of the event | Yes |
Description | A customer-facing description. | No |
GA Tickets / Guest-list | The URL links you wish to display for the purchase of General Admission ticket or guest-list entries | No |
Image | Used for customer-facing pages and digital wallet passes. Must be a .png file. Use tinypng.com to convert and compress other formats. | No |
Packages | Booking options available for this event. These will be publicly displayed and bookable only if available tables are linked. | No |
Tags | Metadata used to track and segment guests who attend | No |
After saving the event, you’ll have options to:
Share a Public Booking link to the event
Duplicate the event
Archive the event
If you’ve created a recurring event, you’ll see an option below the most recent occurrence to add the next event.
Simply click the ”+” to create the next event in the series. The new event will inherit the properties of the previous one, which you can edit if needed.
Was this helpful?