Docs / DQ Pro - Bookings
Creating Bookings
Bookings are the core of every visit to your venue: allowing you to plan, track guest lists, monitor upsells, and more.
The Bookings page in DQ streamlines the process of managing bookings and guest interactions at your venue. Here’s a guide on how to use bookings effectively.
Events Overview
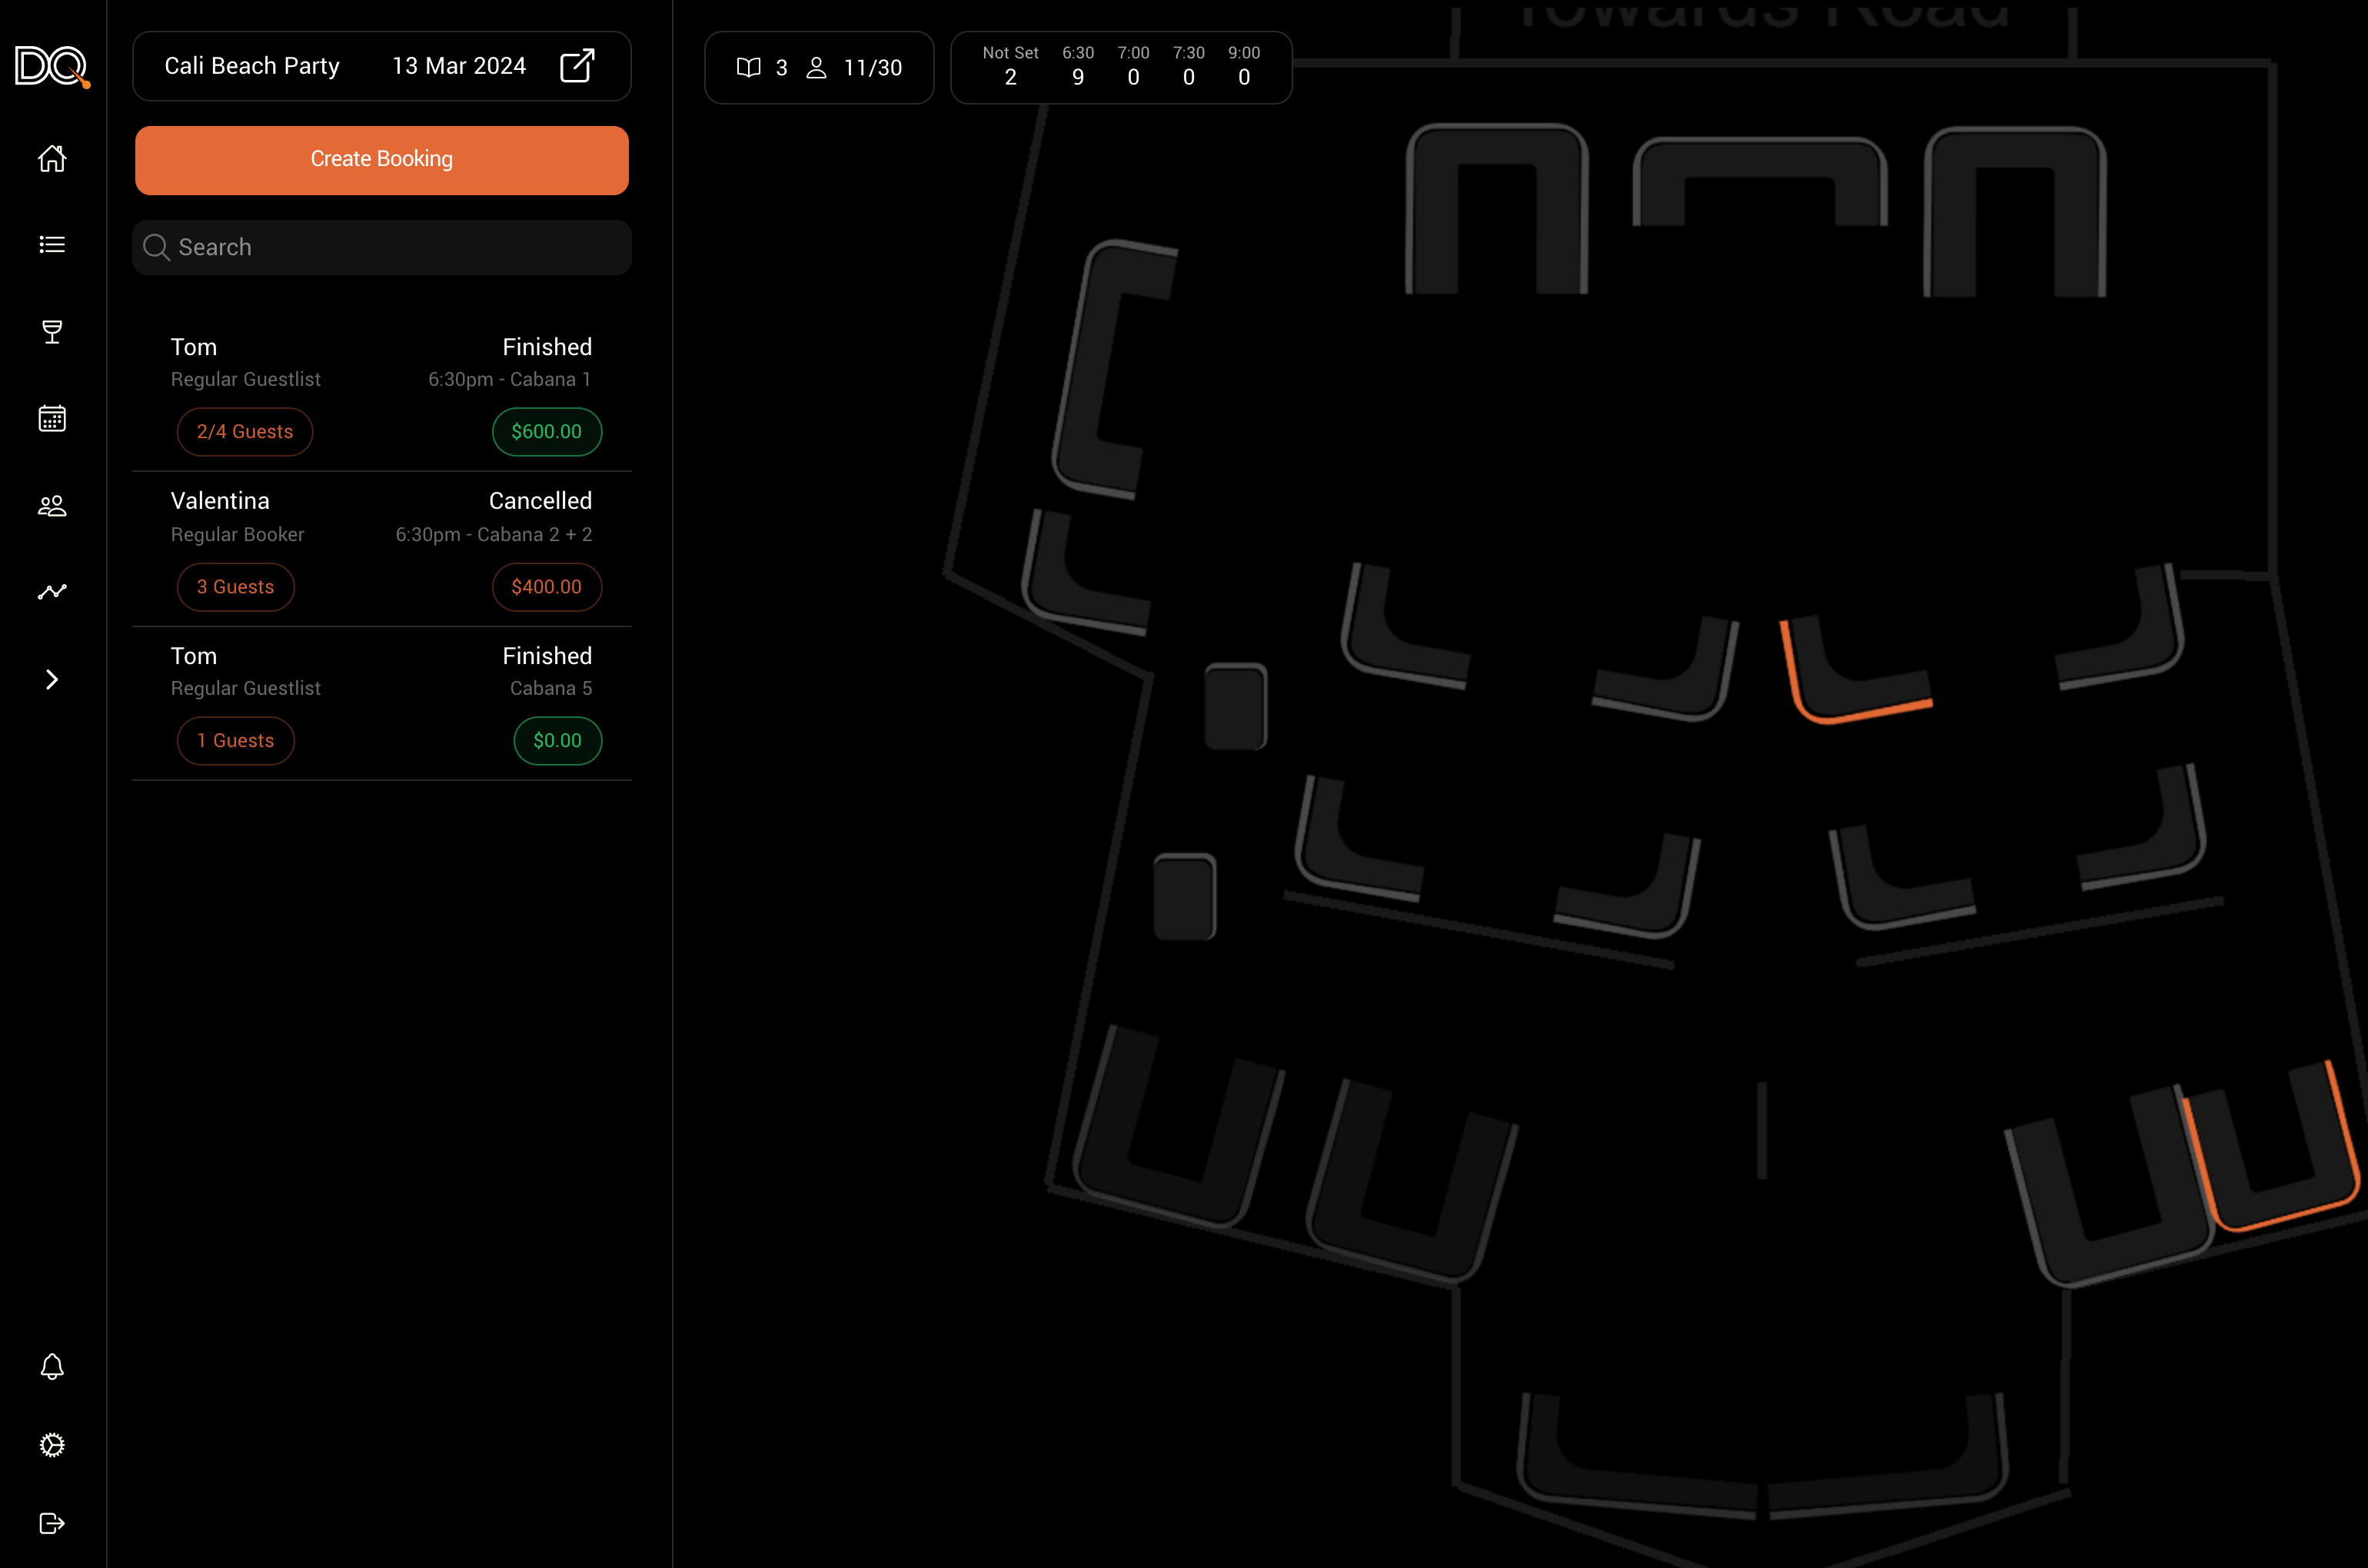
On the bookings management page, you’ll see your venue’s floor plan alongside a list of any pending bookings requiring attention.
To view bookings for a specific event, select the event from the dropdown in the top-left corner.
After selecting an event, you will:
See bookings for that event.
View a color-coded floor plan:
Grey tables are vacant.
Orange tables have a booking.
Clicking on a table will show any bookings associated with it.
The calendar view above the floor plan shows booking distribution across time slots, helping you manage space and time efficiently.
Creating Bookings
Using the Desktop Site
To create a new booking:
Navigate to the Bookings page by selecting the calendar icon from the left-hand menu.
Click “Create New Booking.”
Choose a Package — a templated booking option.
Using the DQ Pro App
In the DQ Pro app:
Go to the Bookings tab (bottom-right).
Tap ”+” to create a booking.
Select a Package or add Included Items.
Property | Description | Required |
|---|---|---|
Event | The event the booking is for | No |
Booking Package | The template used for this booking | No |
Guest | The primary booker | No |
Table | The assigned table(s) | No |
ℹ️ If you have automatic communication enabled, an SMS or email will be sent to the guest with a link to view the booking and invite guests.
Managing Booking Information
Clicking on a booking opens a side panel with detailed information.
You can:
Edit the guest or table by clicking their names.
View and manage booking status, payments, and guest details.
There are three main tabs:
Detail Tab
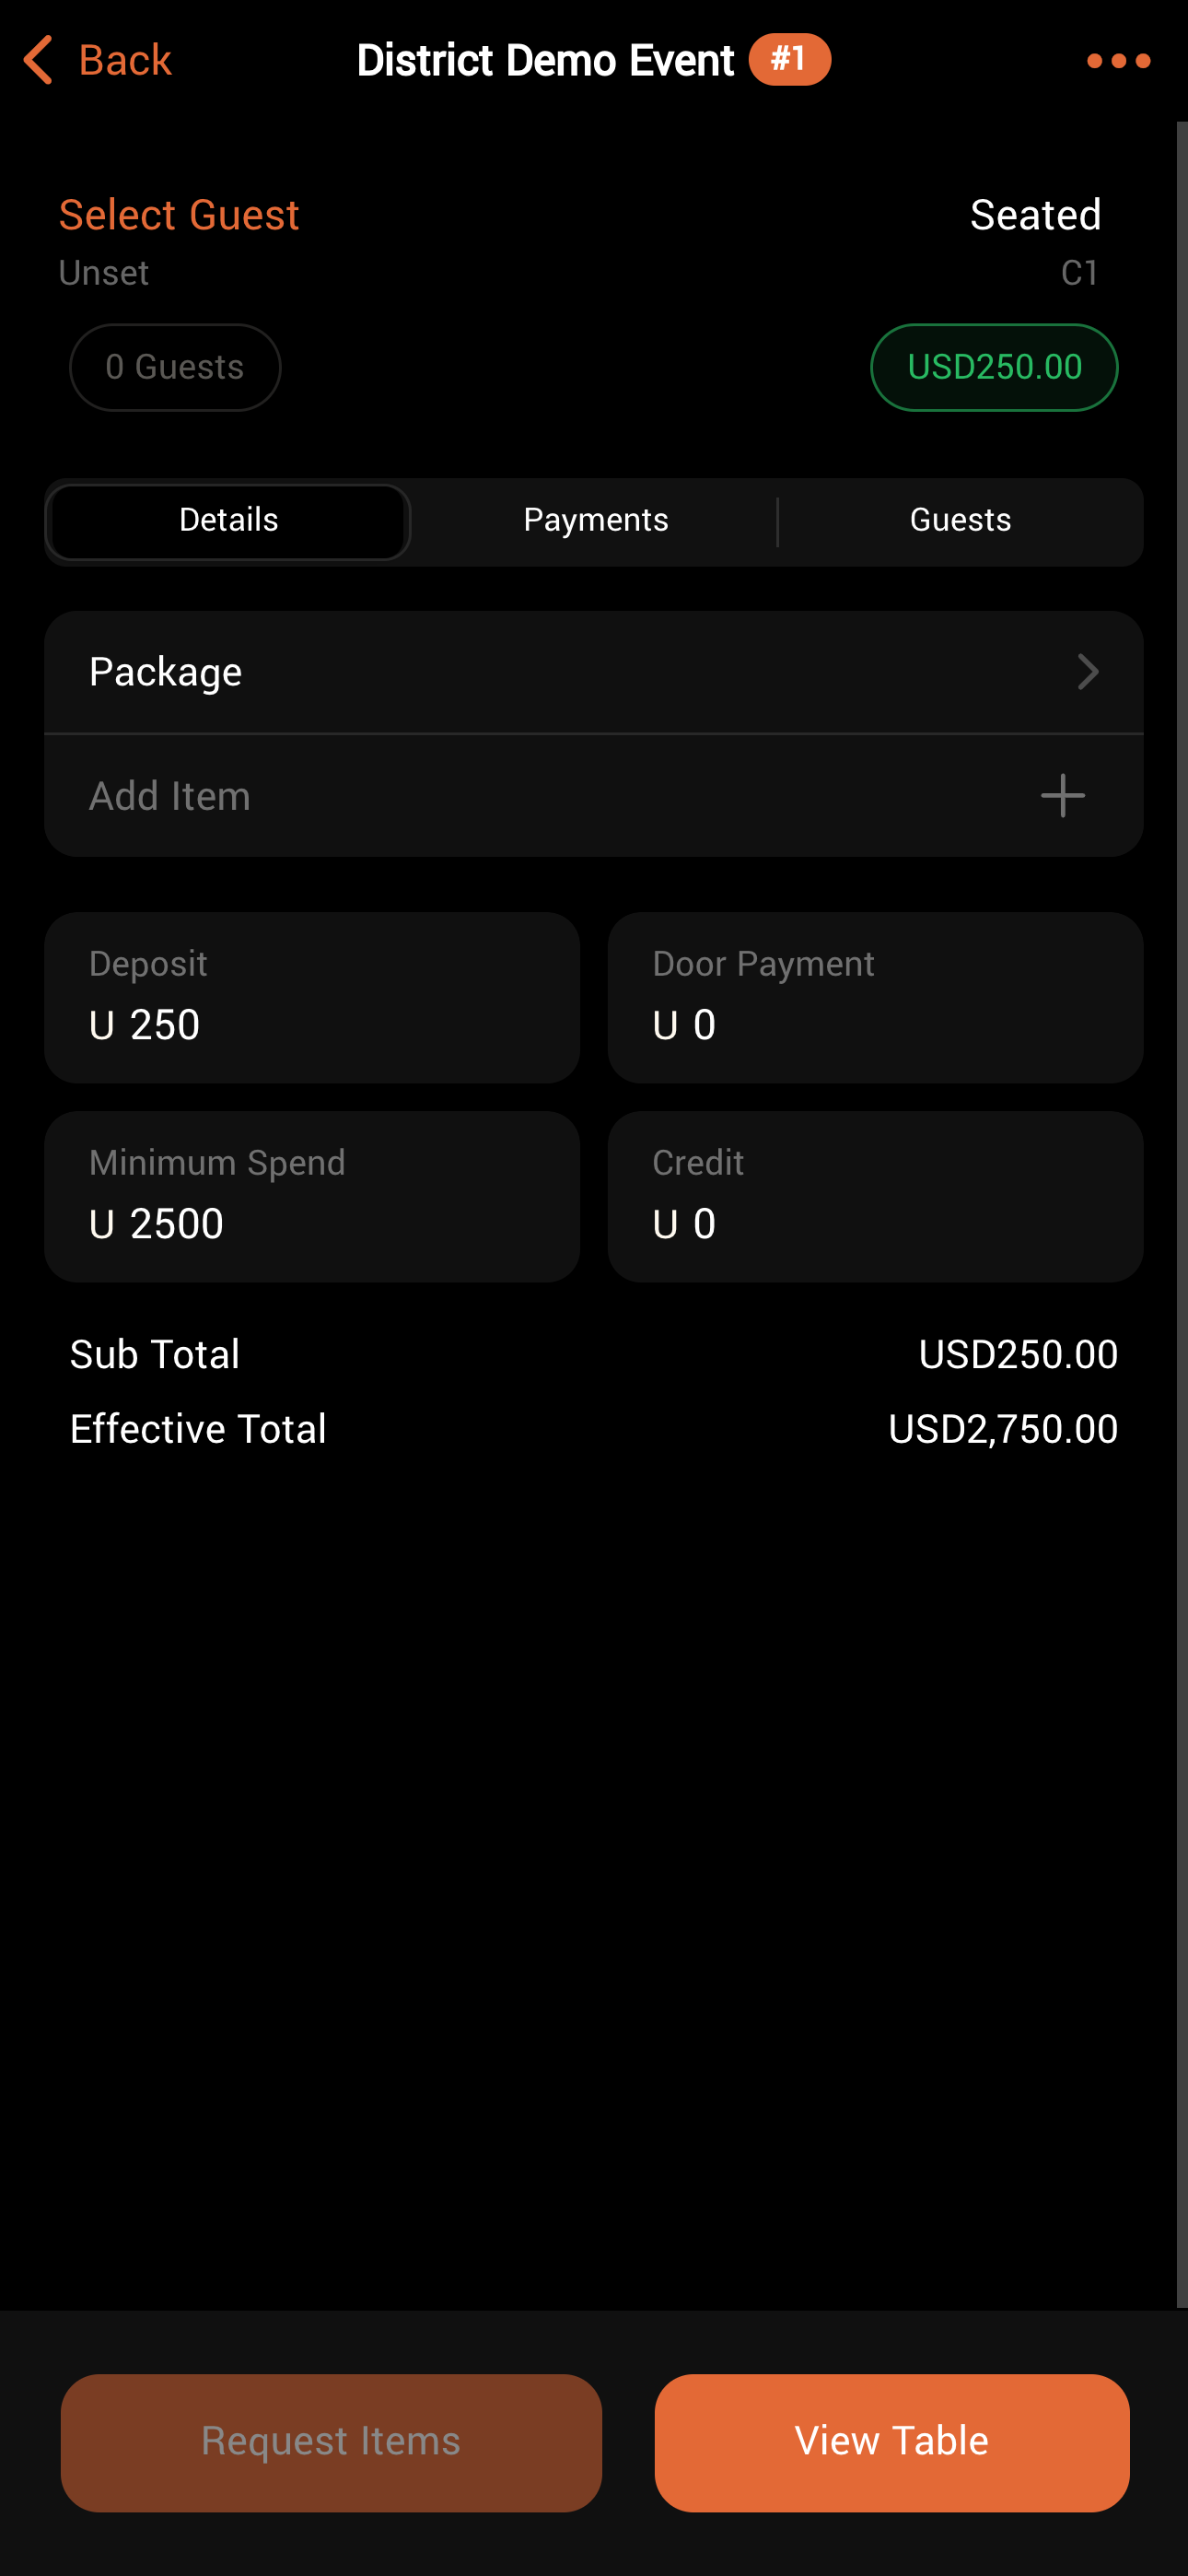
Displays booking payment info and included items.
You can:Change the package.
(Depending on permissions) Edit the cost and inclusions.
Use “Seat Guest” to check the guest in and request included items.
Payment Tab
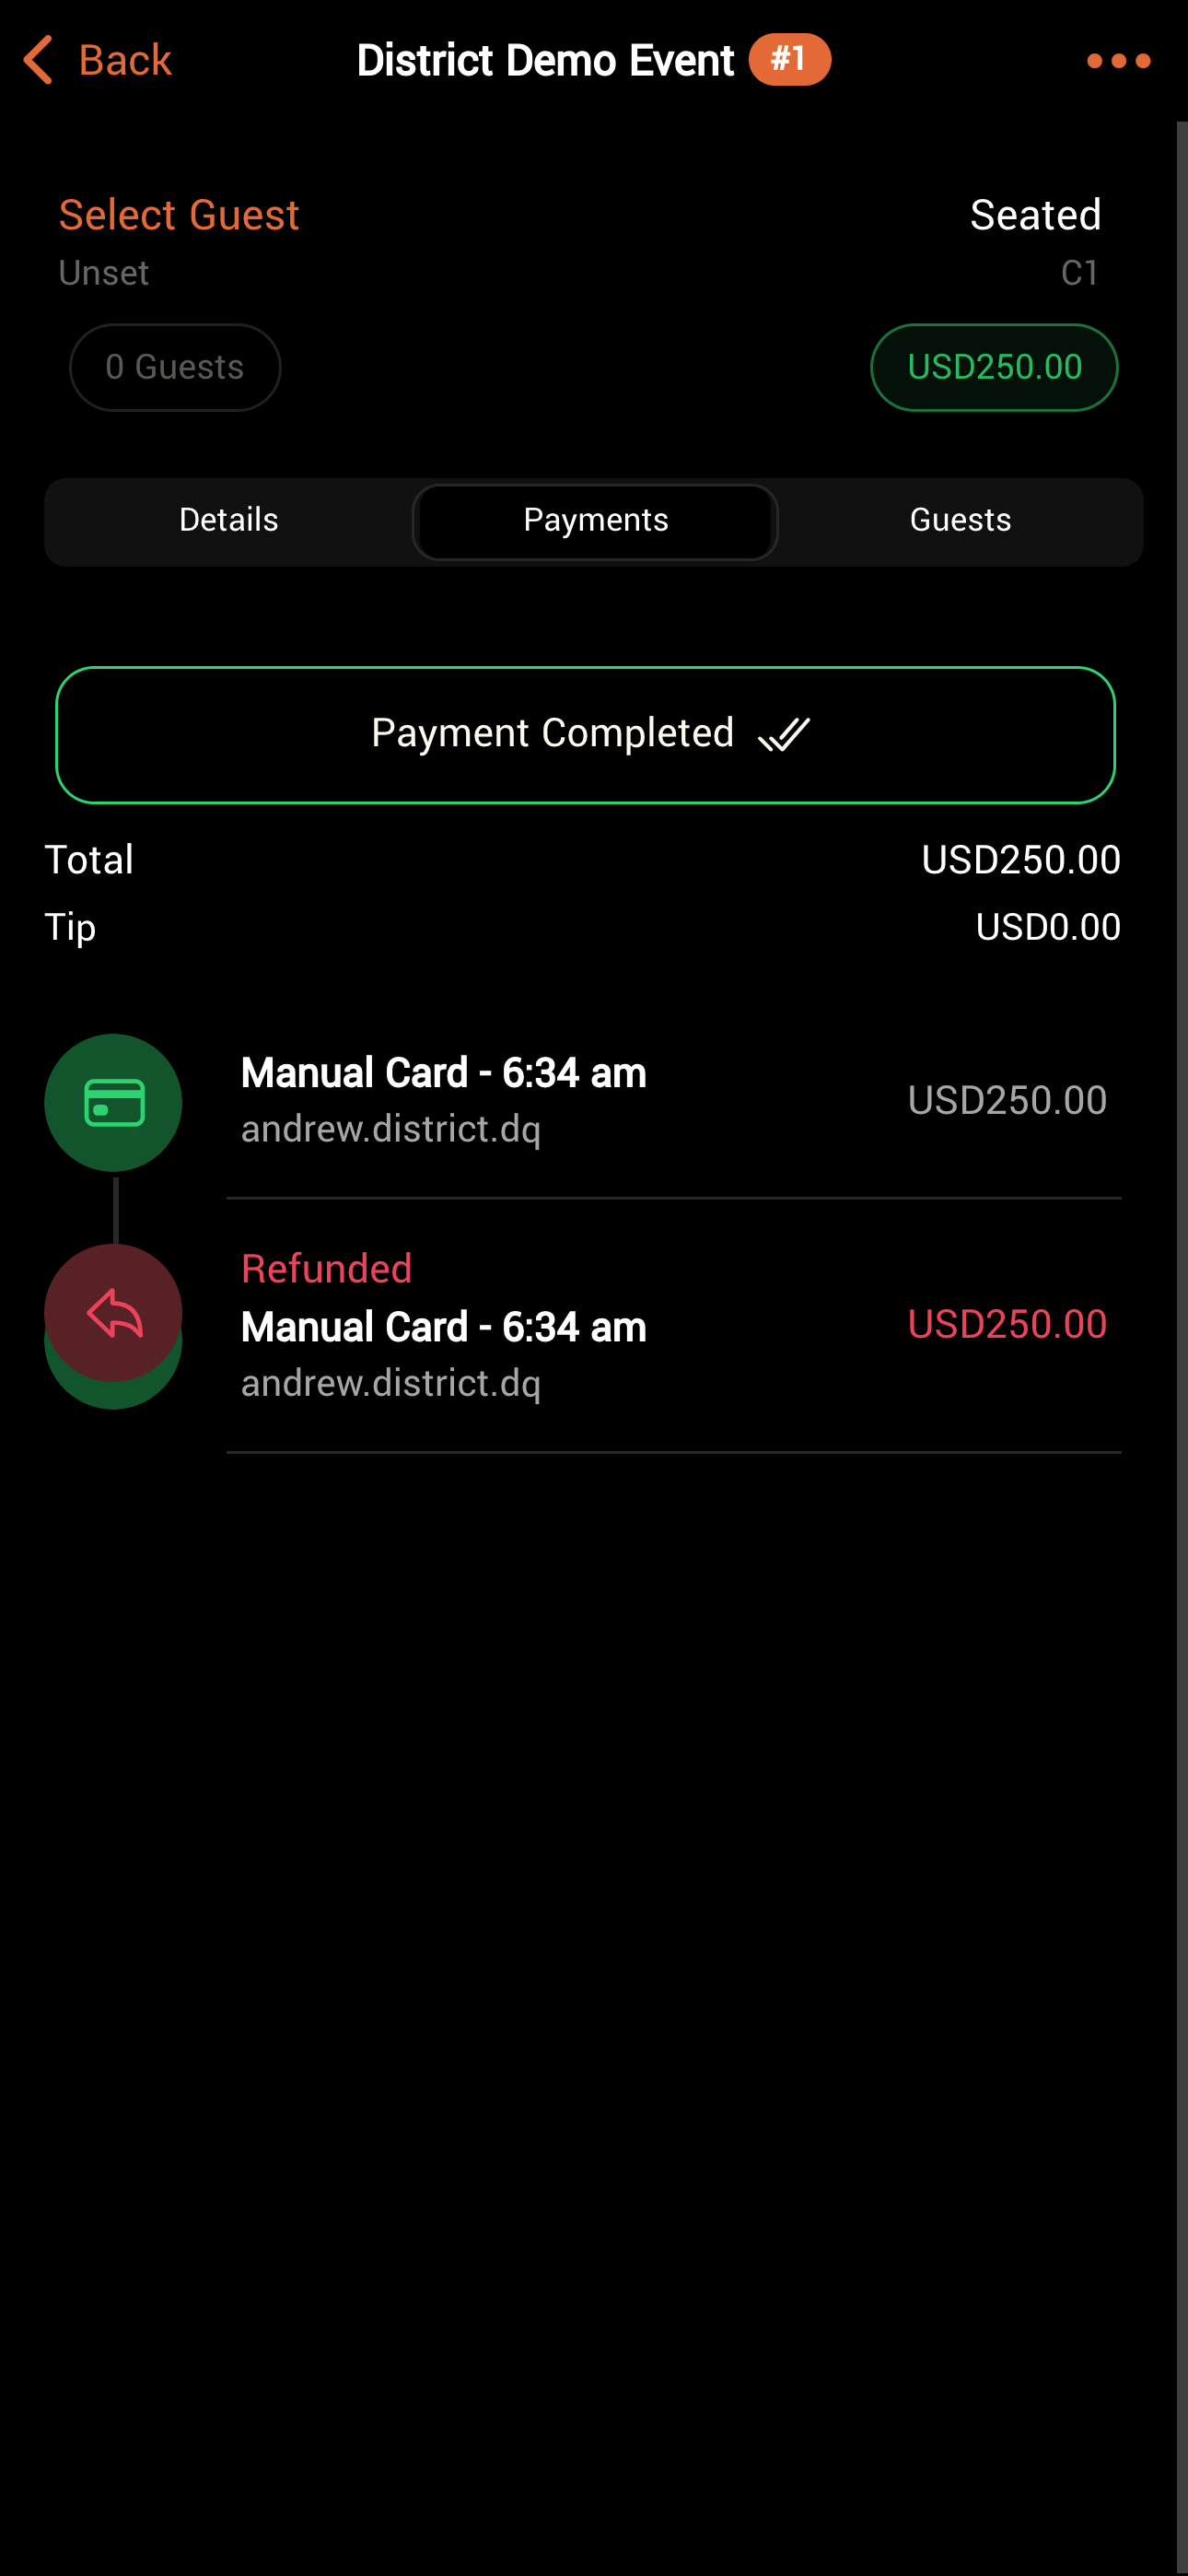
Shows a detailed breakdown of payment activity.Swipe left on a receipt to issue a refund.
Swipe right to send a digital receipt.
More details on managing payments are available here.
Guest Tab
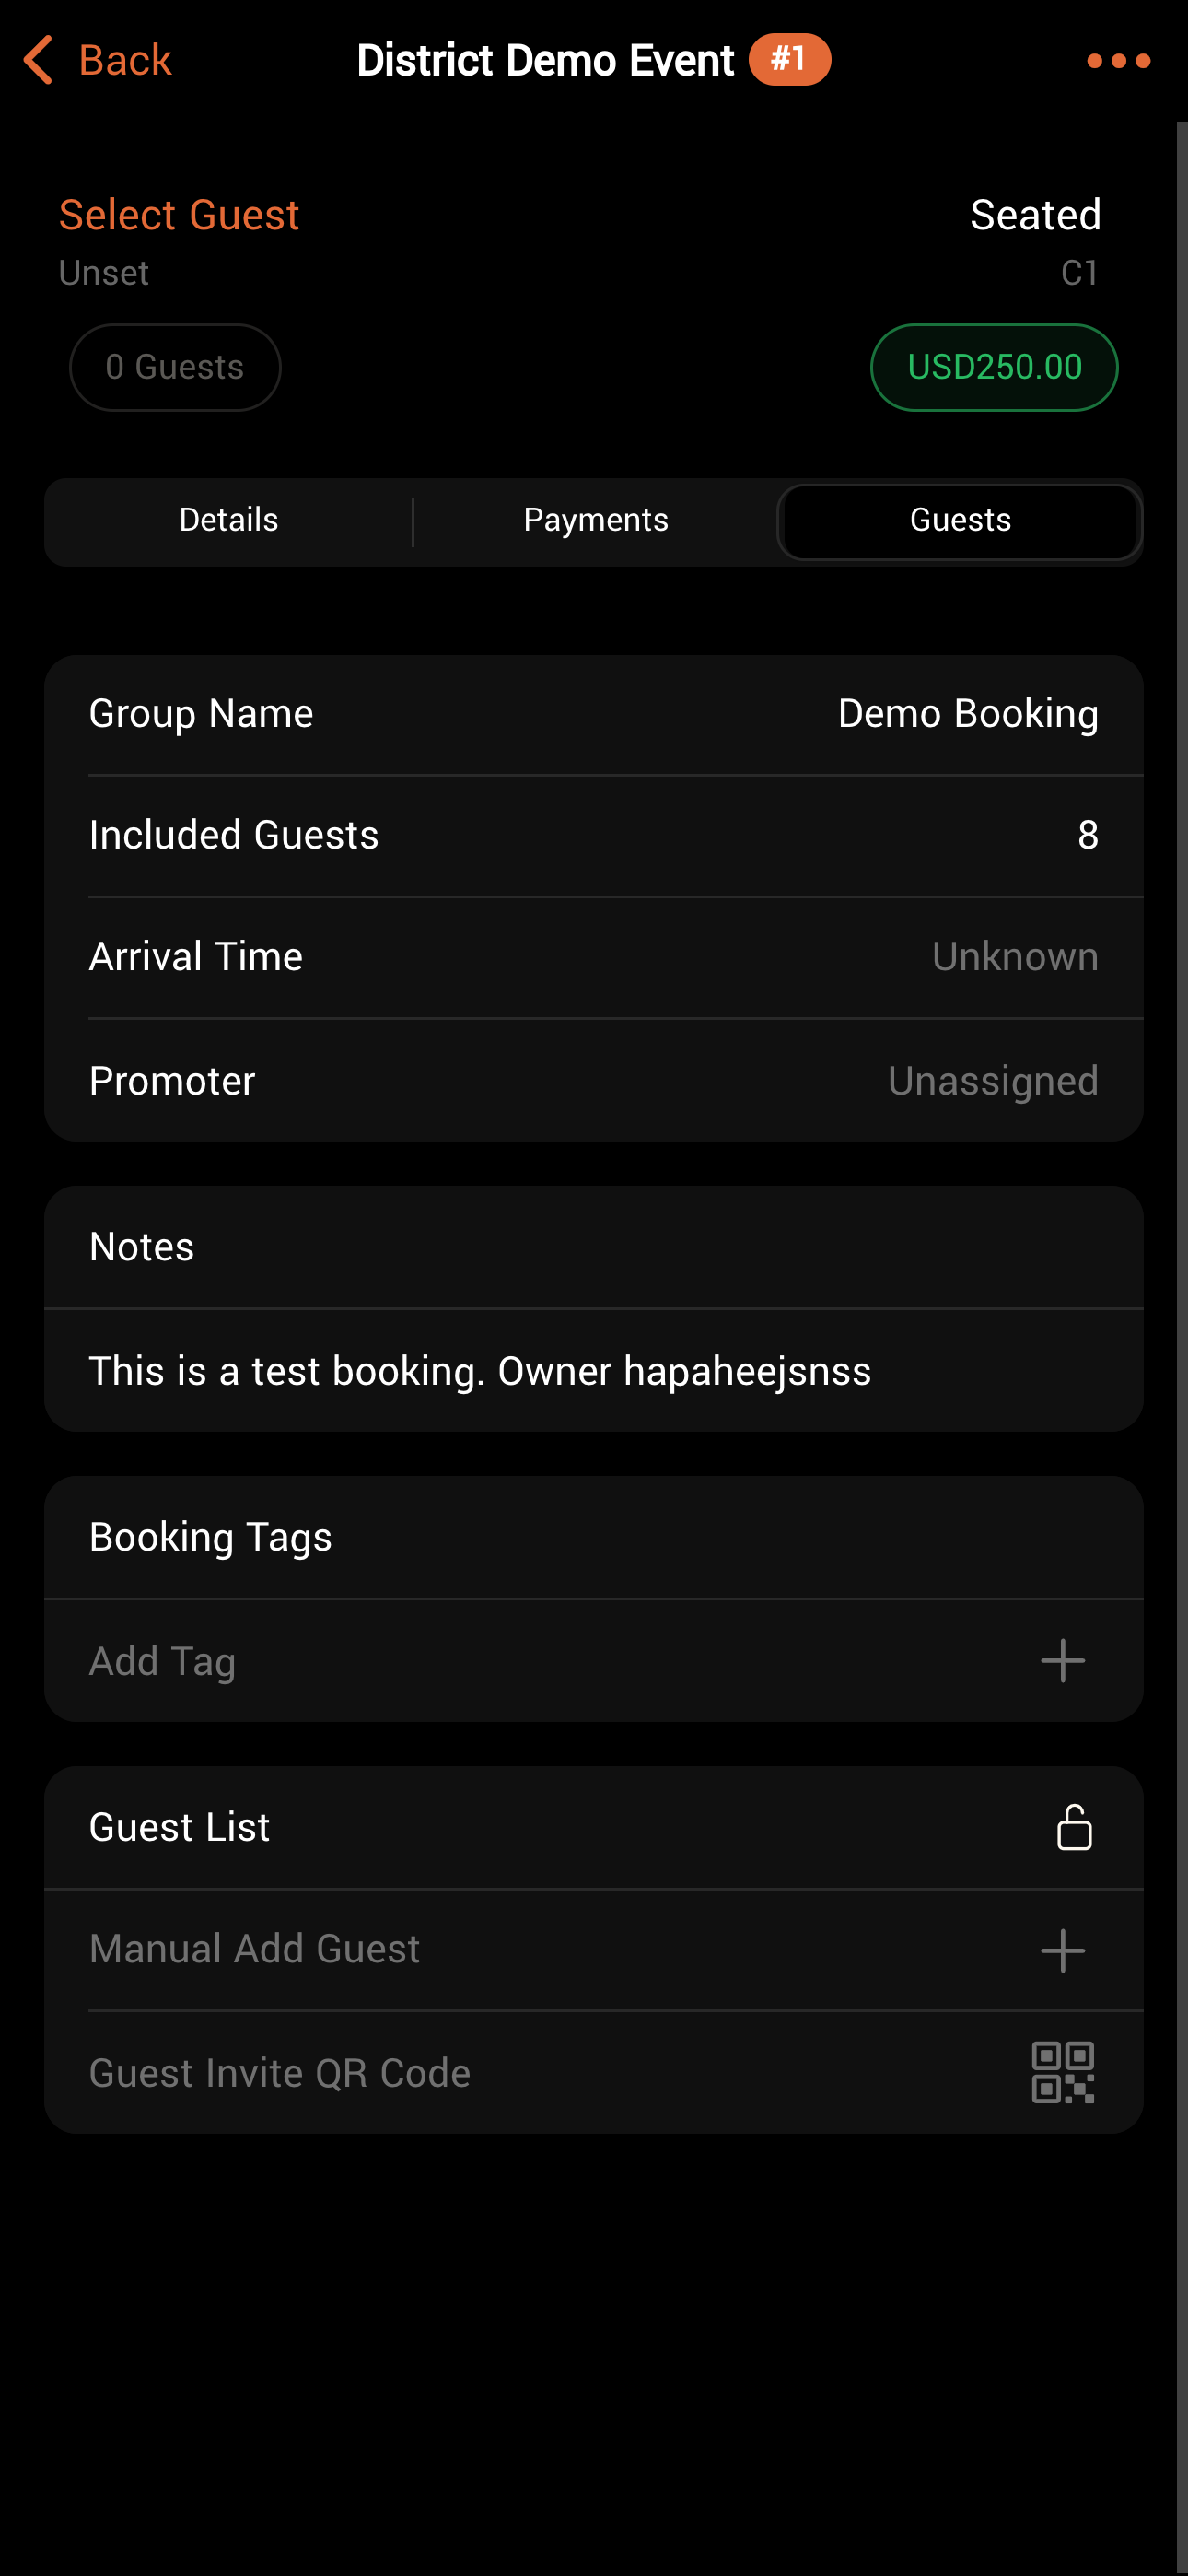
Manage settings related to the guest and their relationship with the venue.Booking Tags: Use tags to highlight important info (e.g., VIP, birthday).
Promoter: See who made the booking, or assign a staff/promoter.
Included Guests: View the max number of guests allowed under the booking.
Arrival Time: Set or view the expected arrival time.
Guest List: Edit the guest list (guests or staff can do this).
Lock the list by clicking the lock icon.
Add guests with “Manual Add Guest.” You can select Anonymous Guest if you don't yet know the full party details.
Invite guests to add themselves with "Guest Invite QR code"
Remove guests by swiping left.
Once seated, check guests in using the checkbox next to their names.
Was this helpful?